This is not supported by Microsoft, it will work and would be useable as a last resort but I would strongly recommend that you migrate any code with the custom assemblies to the Azure service fabric instead.
Sometimes a plugin turns out to be a little more complex and needs a third party assembly, or you might be really organised and have an assembly or project in your solution that contains a lot of ready written Dynamics code that you don’t want to spend time copying and pasting into your code each time you want to use it.
If you use one of these in the normal way once you deploy your plugin to Dynamics it will simply complain because it doesn’t have the necessary dependency. In the old days with on-premise solutions this could be solved easily by copying the required assemblies into the GAC on the CRM server.
For cloud solutions you need a tool like ‘ILMERGE.EXE’ And best of all if you are writing in Visual Studio you can automate the whole process so simply pressing F5 will build and then link all the assemblies together into something you can easily deploy.
So first of all you need to download ILMERGE.EXE and the simplest way to do that is to get it from Nuget from within Visual Studio.

Once it is downloaded it will be installed into the \packages directory.
The application is command line driven but the command line is really simple to use. And the basic command line you will be running will be:
ILMerge.exe /target:library /out:mylinked.dll dll1.dll dll2.dll /keyfile:mykey.snk
Essentially what we are doing is telling it the name of the assembly we want created in the /out: parameter.
Next we are giving it a list of assemblies that we wish to link, dll1.dll and dll2.dll.
And finally with the /keyfile: parameter we are correctly signing the assembly otherwise we won’t be able to upload it to Dynamics 365.
At this point is quite straightforward to create a small batch file and manually like the assemblies each time you build your project.
Alternatively we can automate the process so that the assemblies are linked each time the project is built.
First in your project ensure that any referenced assemblies that you want to be linked will be copied to the output directory using the Copy Local = True option.
Next create a small batch file and include it in your project. Call it ILMerge.bat and ensure it won’t be copied to the output directory.
Inside the batchfile use this code
CD %1
Copy ..\..\mykeyfile.snk mykeyfile.snk
Copy MyAssemby.dll temp.dll
Del MyAssembly.dll
..\..\..\packages\ILMerge.2.14.1208\tools\ILMerge.exe /target:library /out:MyAssembly.dll temp.dll NewtonsoftJson.dll /keyfile:mykeyfile.snkDEL temp.dll
DEL mykeyfile.snkEcho Merged
In this example the assembly I am building is called MyAssembly and the extra assembly it requires is the NewtonSoft Json assembly. You will need to change these depending on your own requirements. You will also need to ensure that the ILmerge directory is correct as a different version number will need a small change.
The batch file performs the following steps.
- It goes to the correct directory, which will be either Debug or Release depending on your settings at compile time.
- Next it copies the .snk key file that you generated earlier for the assembly.
- Next it makes a temp copy of the assembly that has just been built
- Then it deletes the assembly.
- Next ILMERGE does its magic and brings it all together.
- Then the temp assembly gets deleted as we don’t need it
- Then the keyfile gets deleted as we will pull it across next time in case it changes.
- Display a message in the Visual Studio console to say it merged.
That’s it.
Now we just need to plug this into Visual Studio.
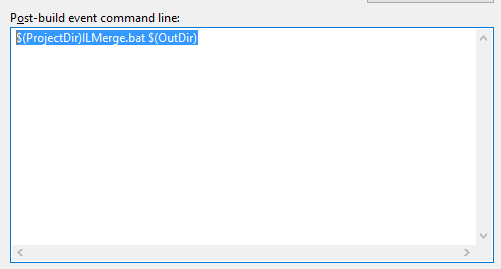
To do this open the project information pane and go to the Build Events section.
In the Post-Build events box add the following code:
$(ProjectDir)ILMerge.bat $(OutDir)

That’s it, job done.
Each time you build your project the assemblies should all now be linked, all you have to do is remember to add any new ones that need to be included as your project progresses.